Showing posts with label Chef Maki. Show all posts

Wednesday, March 9, 2011

Baby Finger Food with Chef Maki

I am getting close to being at the baby-ready-to-eat-on-his-own stage of life again. So, I thought a little refresher for myself would be in order. I did a little looking around on line and didn't find too much new info, so I guess just sticking to what I have always done is a good plan. :)

When starting baby out on finger food, I like to keep things quite simple and as healthy as possible. They'll get introduced to junk food soon enough, unfortunately.

Some of my rules I have set for myself, or rather for my babies, are these{in random order}...

1. No meat until after 1 year

2. No honey until after 1 year

3. Absolutely no refined/processed/sugary/artificial foods until after 1 year (not that I want them to have these things after they have hit the year mark, but if you want to make me mama bear mad, just feed my baby junk food)

4. Introduce one item at a time when starting them off

5. Don't worry too much about when they begin eating solids. As long as they are growing and happy and healthy, it doesn't matter. They don't have to start eating rice cereal at 4 months old. It is okay if they have a rather unvaried diet at 7 months (the current age of my youngest)

6. Start finger foods when you feel like it. Baby should be able to easily pick up small objects, mastered being spoon fed, and seem to be able to mash their food around in their mouth that you have spoon fed them. Also, they probably should be ready to graduate from eating solid foods just once a day.

7. Start off feeding the baby very runny foods, not too thick.

8. Use a little mini food processor or blender to easily puree cooked carrots, apples, pears, etc for homemade first foods.

9. Mix homemade pureed foods with brown rice cereal and rice milk (check ingredients on label if you buy this)

10. Start with just one meal a day.

11. Mash things like banana, sweet potato, etc. with a fork and add a little water if necessary to make it thinner. No need to cook the banana.

Here is how I like to make finger foods. First, I start with a raw fruit or vegetable like celery. (There are tons of choices available, obviously)

I wash them and cut them into very small pieces. Then I put them in a small pot to boil, like these carrots.

When the fruit or veggie is nice and soft tender, I remove it from the pot and put it in a sealable container and put it in the fridge so that it is ready when baby is. Those are apples in the picture below. To keep things simple, I cooked these items one right after the other. When I was done I had several small meals ready for my little person to eat without a lot of trouble for me to fix when he is ready to eat.


Cooked fruits & veggies are a great starter finger food--healthy, easy to fix and easy for baby to grab.

There are some things that make a decent finger food that do not need to be cooked. Some of these can be used for starter foods, others save for when they are a little older and have the hang of it and can tolerate more than one ingredient at a time. For instance...

  • banana
  • avocado (I haven't tried this yet. This is one of the few ideas I found online!)
  • very ripe peach
  • very ripe pear
  • very ripe cantaloupe
  • watermelon (no seeds)
  • whole grain breads cut in small squares (Make sure the bread has no nuts or kernels or honey. )
  • finely cut cooked pasta. rice pasta, wheat pasta, etc.
  • cereal (Check ingredient labels! You can get cereal from a health food store or farmers market that often has much better ingredients than grocery store brands. The fewer ingredients the better. Toasted oat type cereals are good since they don't have much sweetener and are easily dissolved.)
  • Homemade waffles & pancakes made with whole grains
As baby gets older, more variety can be added. Here are a few ideas for even older babies/toddlers.
  • chickpeas (garbanzo beans)
  • kidney, pinto, navy and other beans
  • bits of cheese
  • cooked oats
  • cooked rice globs
  • scrambled eggs
  • hard boiled eggs cut up
  • grated fruit or vegetables
Planning ahead is a key ingredient for healthy baby food. I don't usually use much ready made things for babies. But I do keep a few things on hand just in case my planning ahead has glitches!


Tuesday, July 7, 2009

Oatmeal Add-Ins with Chef Maki

Personally, I like oatmeal, but it is fun to dress it up to make it tastier and offer more variety in the same dish. To prepare a more jazzed up version of basic oatmeal for your family, you can prepare the oats by boiling them in water first, or you can put the add-ins along with the oats as they are cooking.

1. Raisins and other dried fruit are great to put into the boiling water. This plumps them up and makes them full of juicy flavor.

2. Apples are delicious when chopped and either cooked or added directly to the serving bowl.

3. Chopped nuts provide protein to help ensure a filling meal. Try pecans, walnuts, almonds, cashews, sesame seeds, etc.

4. Coconut offers a surprising, yet yummy twist.

5. Trying out different sweeteners can make for a whole different flavor. Honey, brown sugar, stevia, molasses, maple syrup and jam are all fun ones to try.

6. Wheat germ or flax seed meal are wonderful ways to sneak in a few extra nutrients.

7. Topping the oatmeal with fresh fruit and berries not only adds nutrition, but wonderful eye appeal as well. Adding frozen blueberries or raspberries is my children's favorite way to cool their oatmeal down.

8. Try your oatmeal without milk, or with different kinds of milk. Rice milk, soy milk and almond milk are a few viable options that offer slightly different yet tasty and enjoyable flavors.

Get creative. See what else is hiding out in your pantry or fridge that you never thought to try before. You never know, you might hit upon something fantastic! Let me know what you do with your oatmeal!

Monday, May 18, 2009

Chef Maki Makes Mixes (Muffins)

Multigrain Muffin Mix
8 cups flours (I used barley, oat, soft wheat, rye, a little flax, and millet,)
1.5 cups fructose
3 tablespoons baking powder
1.25 teaspoons salt
2 teaspoons cinnamon
2 teaspoons nutmeg

Combine everything in a large bowl and put into gallon size zippy bag.

To make muffins later...
Preheat oven to 375 degrees or toaster oven to 350.

In a bowl, mix together:
1.5 cups baking mix
1 tablespoons corn oil
1 egg
1/4 cup water
½ cup milk
3/4 cup berries, raisins, apples, etc. if desired.

Bake for 20 min in oven or 15 in toaster oven. I use the aluminum bake cups that you can put directly on a cookie sheet so you don’t need a muffin tin and it fits in the toaster oven. Makes 6 nice sized muffins.

No picture, but they tasted quite good!

For Pancake Mix, click here.

Chef Maki Makes Mixes (Pancake)

I've had to make some dietary adjustments for one child, so I have been experimenting in the kitchenfor quick and easy things to feed him. It is nice to have things premade, or at least partly made in order to get them to the table more quickly! The following recipe you can substitute the oat flour for a mixture of several other flours and that still meets with the approval of the eater. :)

Oat Flour Pancake Mix

12 cups oat flour (just grind flakes in blender or food processor until flour-like)
1/4 cup baking powder
1.5 tsp salt
1 tsp fructose or 1/2 tsp sugar

Mix ingredients all around and store in a labeled Ziploc baggie. When ready to use, in a bowl, mix together:
1 egg, whisked
½ cup almond, soy, rice, or regular milk
½ cup water

Then add 1 cup mix. Let the batter sit for about 3 to 5 minutes. Yes, it will be thick.

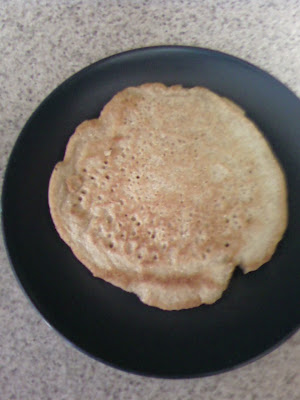
Put a little corn oil in a skillet on medium low heat. Ladle in batter and cook on one side until round air holes appear on the top side--be patient, it takes a while. Flip the cake over for a short while to lightly brown the second side.


Stupid picture of imperfect multigrain pancake...

This is best served with blueberry or strawberry sauce which is made by mixing together:

Fruit Sauce
1 cup water
1 Tbs cornstarch
½ to 1 ½ cup blueberries or strawberries
Sweetener of choice (honey, agave nectar, fructose, etc.)
Bring mixture to a slow boil over medium heat. Store leftovers in the refrigerator.
For Muffin Mix, click here.

Monday, April 13, 2009

Chef Maki's Honey Poppy Seed Salad Dressing

I was concerned that this wasn't going to turn out so well, but it met with rave reviews at our Easter dinner get-together. Yay! So, I am sharing the recipe. It is wonderful with salad, especially one with berries and spinach included.

Honey Poppy Seed Salad Dressing

1/2 cup honey

1/2 tsp mustard powder

1/2 tsp salt

1/3 cup apple cider vinegar

1 TBS (about 1/4) of a finely grated onion (include juice)

1/2 cup olive oil

1/2 cup corn oil

1 TBS poppy seeds.

Put all ingredients in a mason jar and shake vigorously until well mixed. Sorry, no photo this time. It looks quite pretty over the salad, however. :)

Don't forget to do your Spring Clean for 5 Minutes today!

Thursday, March 26, 2009

"Oatmeal Raisin What? Cookies" from Chef Maki

I am sure you have heard of a lot of strange things in your life. I am sure most of you won't dare try this recipe. But, they are really, really yummmmmmmy. Seriously.

Oatmeal Raisin What? Cookies

Beat together until smooth:
¾ cup mashed beans (white or butter beans) Mash them in blender or little food processor.
¾ cup butter (half of this can be applesauce)
½ cup fructose
1 ¼-1 ½ cups dark brown sugar (I like the dark kind because it has more molasses left in it than the light kind & I hope that means a little less processed!)

Add:
2 eggs
2 tsp vanilla (use the real stuff, not imitation)
(or more) This ingredient is a must have!

In a separate bowl, mix together:
2 cups whole wheat flour
2 tsp baking powder (Rumford aluminum free)
½ tsp baking soda
2 ½ -3 tsp cinnamon
1 tsp nutmeg
1 tsp cloves

Add the two mixtures together thoroughly, then add a little at a time:
1 ½ cups white flour

Stir in half at a time:
4 cups regular rolled oats (not quick)
1-2 cups raisins.

Drop or roll into balls and lightly press cookie down on lightly greased cookie sheet. Bake in a preheated 375 degree oven for 10-12 minutes.
Here's the approximate size I make them.
This recipe makes about 8 dozen small cookies. Either cut the recipe in half, or freeze half for another time, or both!
Here is the little food processer I use for small jobs, in case you are interested. :)

Fit for 5 here!

Friday, March 20, 2009

Makiavelli Teams up with Chef Maki

Learning about fish? Having a themed party? Wanna do something different, just for fun? This may work for you! Bake zucchini bread in pie tins like this: Turn out one of the zucchini breads whole onto a cookie sheet. Cut another of the breads into quarters, using one quarter for the fish tail. Cut another piece for a top fin. Add a small piece of candy, raisin, or date for the eyeball and there's your fish!

Now that was easy, wasn't it?!
It isn't too late to join in on doing the Fit for 5 challenge this month. Have you reported back lately? It's okay if you haven't. This is just a friendly reminder to get moving! ;)
See show & tells here.

Monday, March 16, 2009

Homemade Cold Cereal with Chef Maki

Cold cereal can be expensive and not nutritious, so here are a couple of alternatives. Both very yummy and pretty simple to make. Pardon the picture quality. I really should stop taking pictures with my phone, but it is so convenient! :)

Graham Crunch

1/2 Cups Whole Wheat Flour
2/3 Cups Almond Meal (Buy like this or just grind up almonds until powdery.)
3/4 Cups Dark or Medium Brown Sugar
2 Cups of Milk
1 tsp Baking Soda
1/4 tsp Salt
4 Crushed Graham Crackers (1 graham cracker = 1 rectangle that can split into 4 parts)


Mix all the ingredients thoroughly together with egg beater. Spread thinly on 2 large, buttered cookie sheets. Bake for 20 minutes at 350 degrees.


While baking the second cookie sheet, scoop the cereal from the first cookie sheet and put it in blender or food processor (1/2 at a time) and do a few quick pulses of the blades. (You should have large crumbs.) Put the cereal back on the cookie sheet. Take the other cookie sheet out of the oven and do the same. (Yes, it is still hot.)


Now put both cookie sheets back in the oven and turn the oven off. (They can slightly overlap if needed.) In the morning, put the now crunchy cereal into an airtight container.

Enjoy with sliced fresh strawberries and milk if desired. Also makes a good topping for a fruit & yogurt parfait with homemade crockpot yogurt.


Muesli/Granola Stuff

I call it granola if it has been oven toasted, Muesli if it is eaten without baking. The beauty of this recipe is that you can just throw in whatever you have on hand and it tastes good. I make huge batches, so whereas I may throw in a whole cannister of regular oats, you may just want a couple of cups. Use some or all of these ingredients.

These four are the foundation, so I highly recommend using these:

Oats
Whole Wheat Flour (about a 1 part flour to 6-8 parts oats)
Oil (approximately equal parts oil & honey)
Honey


Here's the optionals:

Shredded coconut
Nuts of any kind--walnuts, almonds, pecans, peanuts, etc.
Seeds of any kind--sunflower, sesame, etc.
Dried fruit of any kind--raisins, craisins, dates, apples, apricots, etc.
Spices--cinnamon, pumkin pie spice, cloves, ginger, nutmeg, etc.
Wheat germ


Mix together everything except the oil and honey. Then, pour the oil and honey over the top and remix. Taste test it. Add more spices and honey if needed. If you are doing muesli, you are now ready to eat it. If you want granola, put it on a cookie sheet and bake at 300 for about an hour, stirring it around every 20 minutes. If making granola, I suggest not adding the fruit until after you have baked it because the fruit tends to get hard and crunchy otherwise.


See some of my other breakfast tips here and here.


Did you do your Fit for 5 today?

Baking soda tips here.

More recipes at Tammy's Recipes blog carnival.

Monday, February 16, 2009

Broccoli Hater's Broccoli Salad from Chef Maki's Kitchen


Broccoli Salad
Mix together:
Juice of 1 lemon
1/2-3/4 cup mayonnaise
1/2 cup plain yogurt (homemade crockpot yogurt here)
2-3 TBS sugar
Add:
4 Broccoli stalks & flowers, in small, bite size pieces
1/2 small red onion, finely chopped
1/2 cup raw sunflower seeds
1 -2 cups red grapes, halved (or not)
1/2 pkg turkey bacon, cut in small pieces (no need to cook if package says it is already fully cooked)
1 cup shredded carrots
Mix it around to coat. Serve. Yum! Even my broccoli haters like this salad. This salad gives you a flavor packed treat in each delicious bite!
In the picture, you see no red grapes. This is because I had none this go around, so I substituted raisins. It looks prettier with the red grapes. {My picture isn't too pretty anyway since I took it too close up, but you get the general idea.} I also subbed green onions and yellow onion for the red onion, for the same reason. You can make several variations and still have a yummy salad.

Thursday, January 29, 2009

Homemade Ranch Dressing & Random Kitchen Tips from Chef Maki

Anytime you cook something in the kitchen, it is nice to have a prep chef handy to get the ingredients and do other odd jobs.Always make sure to watch where you splash and splatter, especially if your view while cooking resembles mine.

For this particular recipe, let's begin with the end in mind. Voila! Homemade ranch in a mason jar.
This ranch is quite tasty and doesn't have any ingredients in it that I can't pronounce. (My Mama taught me that the more things on a label's list of ingredients you can't pronounce, the less likely it is to be a healthy product. -- you know, like dianalyne guanalytic sulfonate or some such junk.)
You will need:
  • 1 cup Mayonnaise
  • 1/2 cup Plain yogurt (click here for easy homemade crockpot yogurt.)
  • 1/4 cup Milk
  • 1 tsp Dill weed
  • 1 Large clove minced garlic (or 1 tsp garlic powder)
  • 1 TBS Dried parsley
  • 1 tsp Onion powder
You can try fresh dill, parsley or minced onion, but add more fresh than what is listed for dried above. Just whisk all the ingredients together with a wire whisk. If you make it in the blender, it will be runnier. After it is all mixed, pour it into a mason jar for storing in the fridge. When serving, use a spoon or pour it into a measuring cup that has a pour spout.

Monday, January 12, 2009

Banana Bread for Noble Monkeys from Chef Maki

Start with 5 or 6 of these:Use one of these:


End up with this:


Seriously, here's the recipe for this very yummy banana bread. (And I am not even that fond of banana bread!) The gang scarfed this one down in no time flat.

Noble Monkey Banana Bread

In a mixing bowl, beat:

  • 1 stick Softened butter
  • 5 to 6 Really ripe bananas
  • 2 Large eggs
  • 3/4 cup Dark brown sugar (don't pack the sugar when measuring)

Mix these together in 4 cup measuring cup (pictured above)

  • 1 cup Whole wheat flour
  • 1 cup White flour
  • 1 tsp Baking soda
  • 1/4 tsp salt

Use a wooden spoon to gently stir the dry ingredients into the wet ingredients. Then the batter goes into an 11 inch round baking dish. (Mine is Pampered Chef stoneware.) Sprinkle the top liberally with sliced almonds. Bake in a 350 degree oven for about 40 minutes or until a toothpick comes out clean.

p.s. I got the brown sugar idea from allrecipes.com. I had never done banana bread with brown sugar before and I think that is what makes the difference. Anyway, check there for other recipe ideas.

p.p.s. Find two more food blog carnivals here & here.

Friday, December 26, 2008

Chef Maki Disguises Christmas Leftovers in New Dinners

We had a wonderful, cozy Christmas with just our family. No big get-togethers, just us. (I suppose that is always a big get-together.) We enjoyed spending our day together playing, reading, eating, etc.

But, now we have a ton of leftovers!! I like leftovers. It means less cooking. However, some people prefer not to eat the same exact thing over and over, so I try to be creative. Here are a few things I usually do with our Christmas/Thanksgiving leftovers.
Casserole (Definitely needs a better name.) This dish is awesome for the cook because it can easily be assembled as you are putting away the leftovers after Christmas dinner. Start by simply lining the bottom of the pan with gravy. Next, make a mashed potatoe rectangle around the edge of the pan. After this, put turkey pieces all over the middle section. I like to put dark meat on one side, light on the other. In a line down the midde, over the top of the turkey, place the leftover corn. Around the corn is the spot reserved for the leftover stuffing. Cover the dish with foil. You can freeze this for a later meal, or serve it in a couple of days. All it requires is for the gravy to start bubbling so you know it is heated through. Just heat it up, covered at about 350 degrees. The pictue below shows the casserole before being heated up. (It is still in the fridge since we haven't eaten it yet!)
I usually cook a Christmas ham too. That allows for making Ham and Bean Soup. To make this, save your ham bone and the liquid that you cooked the ham in. Soak the beans overnight. Cook the beans in the morning. Allow the ham bone to simmer for many hours in a large pot along with the reserved liquid and extra water enough to cover the bone at least. After simmering for as many hours as you wanted it to, remove the ham bone. Then add diced celery, onions, carrots, and whatever other veggies suits your fancy. Add half the cooked beans. Mash up the beans with your potatoe masher. Add the other half of the beans. Simmer until veggies are tender. Usually you don't need to add any other seasonings if you had enough broth left over. If the soup happens to be bland, add a ham bouillion cube. Serve with leftover dinner rolls (if you still have any!) or crackers from the Swedish Christmas party!

Potatoe Pancakes can be made by adding an egg or two to your mashed potatoes. Take a small ball of the mashed potatoes, flatten it, then pat it in seasoned flour. (Salt & pepper or your favorite all purpose seasoning) Then fry the pancakes in a skillet with melted butter.

Homemade Turkey Noodle Soup is a wonderful way to use up the rest of the turkey. If your turkey carcass isn't all in pieces, boil it in a large pot of water to make a great soup stock. Adding celery leaves, diced celery, carrots, onions, garlic, basil and leftover gravy add nutrition and flavor. Make homemade noodles, or add a package of egg noodles.

Sandwiches with leftover meat make a great meal when accompanied by all the side dishes that didn't get finished!

What good ideas do you have for leftovers?

Thursday, November 20, 2008

Chef Maki's WWW Blueberry Muffins

Sitting around the dinner table today, I tried to distract members of my family from talking about items not appropriate to talk about at the dinner table. (Ever happen to you?) My distraction technique was to throw out the first question that came to mind. "Hey! Tell me what I should blog about next?"

Some ideas I actually got:

What I should blog about next? ("Well, you said to tell you that!")
Best films you can watch with your family
How to create nothing (Followed by a guffaw, chortle, snort)
A thankful list
How to deal with a husband who is never around even when he is around
Traditions
Chubby walking
How to eat yams ("That would be boring.")

Perhaps I might blog about one or two of those interesting suggestions, but for today, I am lazy. Therefore I am pulling out this wonderful recipe to share with you so that I don't have to think. Well, I have been thinking about making some of these for about a week, so they have been on my mind. Hope you try them out. They really are quite delightful.

Wonderful Whole Wheat Blueberry Muffins

3 cups Whole wheat flour
1 cup White flour, divided
2 Tbs Baking powder
½ tsp Salt
½ cup Honey
½ cup Butter
2 cups Milk
2 Eggs, slightly beaten
Grated peel from one small lemon
½ bag (8 0z) frozen blueberries

Mix all dry ingredients except ½ cup flour. Add wet ingredients. Stir until just mixed, but not smooth. Mix ½ cup flour with ½ bag of frozen berries. Add to batter. Spoon into greased muffin pan (about 2/3 full). Bake for 20 to 25 minutes at 375 degrees.

Someone want to make me some? I am still feeling too lazy to cook.

Please?

Pretty please?

Pretty, pretty please?

Pretty please and cheesy grin?

Okay, enough begging. Enjoy.

{View Kitchen tips from others at www.tammysrecipes.com}

Tuesday, November 11, 2008

Chef Maki Makes Crockpot Yogurt!

About 6 to 8 months ago, my industrious sister explained to me the procedure she uses to make yogurt. I didn't have the tools she had, so I did some looking around and experimenting on my own and came up with this method that I find to be very easy! Now I make it 2 or 3 times a month.

Why homemade yogurt? It is much less expensive than buying a bunch of little cartons of premade yogurt. It is healthier too because I control what goes in to it. And, of course, most everything seems so much tastier when homemade.

Just for fun, want to know what I spent on the last batch of yogurt? I bought gallon of milk for $1.88 and paid $.95 for the Brown Cow Plain Yogurt. So, for under $3.00 I made an entire gallon of yogurt! Occasionally I see the 32 oz yogurts on sale for $2.00, but that isn't even close to a gallon. (But you knew that, huh.)

A GALLON? What am I going to do with a gallon of yogurt? Well, you could cut my recipe in half if you want, but you can do a lot with yogurt. It keeps a really long time too...that is if you don't have a lot of kids. In which case it disappears before you can turn around and say, "I love my crockpot." Here are some of the things I do with my homemade yogurt.

**Use in place of sour cream. If you use it with build your own burritos you can claim it is sauce instead of sour cream in case you have skeptical eaters.
**Add it to fruit shakes for an extra creamy delight
**Make fruit & yogurt parfaits for breakfast by layering flavored yogurt, granola and various fruits and berries in a bowl. If you use a see through bowl, it makes a pretty presentation. (Yes, I am stealing this idea from my sis. You can see her other great recipes at her unprocessed recipes blog.)
**Combine yogurt with a little lemon and sweetening for a yummy dip for apples and other fruit. **Make salad dressing with it.
**Drizzle over pancakes or waffles (My favorite recipe here)
**Eat it as regular yogurt

Here's what I do to make the yogurt:

Ingredients:
1 gallon of whole milk
4 oz or more Brown Cow plain yogurt (Can use other brands, but this is best. Find in health food section usually)

Pour the milk into the crockpot first thing in the morning. Turn the crockpot on low. I tuck my thermometer along the edge of the lid. When it gets to about 178 to 180 degrees, turn the crockpot off and remove the lid. This site says that you can actually just turn the crockpot on for 2 1/2 hours and not worry about the temperature. This will probably work just fine. I haven't tried it yet, but the people that commented said it works too.


When the milk has cooled to 120 degrees, scoop out about 1 cup of the milk and mix it with the yogurt. (The site mentioned above says do this after the crockpot has been off for 3 hours) Add this mixture to the crockpot.
Put the lid back on the crockpot and cover it with a couple of nice fluffy towels and/or a big ol' Mexican blanket like I did. Then, just leave it alone. You don't need the thermometer or anything. Just let it sit. NO PEEKING!


When you are ready to go to bed at night, remove the towels. Take the crockpot off its base and put it in the fridge. In the morning you will have tantalizing yogurt to eat for breakfast. This yogurt is not a thick custard style yogurt. It is creamy and smooth, but not terribly thick.

Sweeten it with jam, fruit, honey, stevia, sugar, or whatever you can imagine.

Transfer the contents to a sealable container and enjoy until it is gone. Then make some more because it is so simple!

Friday, October 31, 2008

Chef Maki's Christmas Recipes--Pepparkakor and Warm Cinnamon Milk!

Here's a couple of promised recipes from my Christmas traditions post. The first recipe has lots of fattening stuff in it, but the cookies themselves are very thin, so if you can keep yourself from eating lots of them, you should be in good shape. (Ha ha, that has a double meaning.) But, then again, it is Christmas and so we indulge a bit, huh?

Kungen’s Pepparkakor (The King's Pepparkakor)

2.5 lbs unbleached white flour, (use ¼ of this in whole wheat for best coloring)
2 cups sugar or 1 cup fructose
1 ¼ cups maple syrup (real)
1 egg
2+ Tablespoons ginger
½+ Tablespoons cloves
1-3+ Tablespoon cinnamon
1-2 Tablespoons cardamom (can make w/o)
1 Tablespoon baking soda
1 lb butter
1 cup whipping cream

Mix about 2 lbs flour with baking soda. Mix in the butter with your fingertips. Wip the cream to a hard meringue-type state. Mix together the sugar, syrup, spices (the + sign means we usually add more than it says) and egg, then add that to the whip cream. Add the flour and mix until it is a smooth dough. Cover the bowl with plastic wrap and let it rest in the fridge for a minimum of 24 hours. Two days is better.

Work the rest of the flour into the dough. Use a rolling pin, roll the dough extremely thin. Use cookie cutters, including hearts, little people, flowers, etc. Put onto cookie sheets. Bake at 425 degrees for about 5 minutes. Let the cookies cool a bit before removing them from the cookie sheet. This makes about 350 cookies—plenty to share with friends.

Every year, and I mean EVERY year, we make these. Here's an old picture from when my older kids were tiny and we baked in the downstairs kitchen at Mormor's (My mom) house. The rolling pins used by Bub and Nanner are the ones my sister and I used as kids, directly from Sweden with the cute red handles. I still have mine and we still use it every year.


We make lots more cookies now than we did when Patchy, Nanner and Bub were small. No, I don't increase the amount of dough. There are actually two reasons. 1) Not as much dough finds its way to little bellies and 2) The kids know how to roll the dough very thin on their own! Occasionally they have gotten it so thin it is almost see through--now that is too thin!

Warm Cinnamon Milk Mix

2 C. powdered milk
1 C. powdered creamer
1 C. sugar
1/2 Tbs. cinnamon

Fill a cup or mug 1/4 to 1/3 full with the mix. Add several drops of vanilla, to taste. While stirring, fill the cup with boiling water, keep stirring.


We first received this from someone as a Christmas gift. It was put into a mason jar and decorated wit the instructions attached. It is really super yummy for dipping pepparkakor!


If there are any other recipes you are really wanting from the Christmas traditions post, let me know. I'll probably share a few more closer to Christmas. Maybe I'll video them actually in the making.

Wednesday, October 29, 2008

Chef Maki's Making Bread with a Little Assistant

Here's the requested "What do you do to make bread?" post. (Yes, I know, finally!)

First, ya better have a recipe...

Chef Maki's Favorite Bread Recipe

3 Cups Whole Wheat Flour
1 Tablespoon SAF instant yeast
1 to 2 teaspoons Salt

2 1/2 Cups Warm Water (Bathtub temperature is good)
3 Tablespoons Oil (I use corn oil)
3 Tablespoons Honey

3 Cups White Flour

Basically, all you need to do is mix up the first 3 ingredients, then add the next 3. Work in the white flour, turning out to knead when you can't stir any longer. Knead for about 10 minutes. Let it rise covered with plastic wrap for about 30 minutes or until doubled. Divide and put into two buttered and floured loaf pans. Let it rise again until double, preferably in warm oven (turn oven on lowest setting for only 1 minute, then turn it off for perfect temperature before putting bread in.) Bake at 350 for about 35 to 45 minutes or until nice golden color is achieved.

That's the recipe. Here's the pointers. Freshly ground wheat is best, of course. I am not going to show off the picture I took of my wheat grinding in my wheat grinder because the picture I took really stunk! It might have been better if I had turned the machine off for a minute so that the kernels stopped moving around. That probably is what made it not want to focus! Ummm, yeah. So, freshly ground wheat is awesome because it is nice and warm (feels good and helps the yeast).

I usually quadruple the batch. That makes about 8 loaves. I freeze a couple, give one or two away and my family scarfs down the rest rapidly.

Adding an additional note here, several hours after original posting. I meant to include the fact that you can use all whole wheat or whatever ratio you would like of wheat to white. The bread will still turn out fine. It typically takes longer kneading time when you use 100% wheat. It can also feel a little gritty on your hands when you knead with only wheat. That's what to watch for. The 100% whole wheat tends to crumble more easily too.

This first video will show you step by step what I do to get the dough together. I totally appreciate Princess making the video more interesting. :)


This next video starts off towards the end of kneading. Tells you what to look for to know you are done kneading, etc.


Now the bread is done rising and this video instructs you on what to do now, including the boys favorite part--punching down the dough!


When I take the loaves out of the oven, I place them on wire racks to cool. I cover them with a non-fuzzy kitchen towel. One secret I learned on accident is that if you put the bread into plastic bags before the bread has completely cooled, your bread won't have a hard crust. It will be nice and soft, through and through. How warm should it be? Not very. Just only slightly warm. If you put it in while it is too hot, you will end up with soggy bread--not so fun.

And here is what happens when the bread has been on the wire racks for a short time. It magically shows up on your cutting board. (Sorry, not the prettiest loaf I have ever made.)

Then the knife carves thick, mouthwatering slices...

Finally, a slice gets slathered with butter that melts upon contact and it indulges in too much raspberry jam. Mmmmmmm! Heavenly!

Nanner, pictured above, told me this horror story: "Mom! There's this girl on my cross-country team who has NEVER tried homemade bread!" Now that is a deprived young lady for sure. Anybody want a slice?

Tuesday, October 21, 2008

Chef Maki Provides Breakfast Tips and Shortcuts

Here are some ideas for breakfast that may be helpful in your quest to provide less expensive and healthy meal options for your family.

~~Rather than buying Honey Bunches of Oats or a similar product, combine corn flakes, homemade granola and dried fruit chunks in a large plastic jar. It is cheaper and healthier!

~~Sprinkle a handful of sliced almonds over your morning Cheerios.

~~Try one or several new oatmeal toppings: honey, raisins, brown sugar, cinnamon, nutmeg, coconut, chopped nuts, fresh or canned fruit, molasses, wheat germ, pumpkin pie spice, dried or frozen fruit, sesame seeds, soy milk, syrup, etc.

~~Put frozen blueberries in cream of wheat or other hot cereal to cool it down for little ones.

~~Mix one box of frosted shredded wheat with one box of regular shredded wheat rather than eating only the frosted kind. This works well with toasted oats and honey nut toasted oats too.

~~Gather fruit that is getting overripe and put it into a smoothie or protein shake.

~~Put leftover cookie crumbs into your homemade granola.

~~Freeze leftover waffles and pancakes on a cookie sheet covered with wax paper. When frozen, transfer them to large Ziploc bags for easily separated delights that are good for a quick, pop-in-the-toaster breakfast.

~~Wash up fruit when you bring it home and place it in large bowls in the fridge for easy access for the kids and hubby (and yourself!) for breakfast and snacks.

Please feel free to share your tips and tricks in the comments section. Also, you can find more tips here where "Tips on Tuesday" is being hosted. (See Oct. 21, 2008 entry)

Thursday, October 9, 2008

Chef Maki Shares: What to do with Pears!

I had a request from an email subscriber. (I like requests.) This subscriber is coming in to an abundance of pears. What to do? What to do? Sure, I have ideas. Part of having a large family means obtaining great quantities of food when it can be had for a great price and/or free! This also means having to figure out what to do with this inexpensive food that you acquired.

Here's what I came up with for pears...

1. An addition to fruit salad

2. Sliced on cereal

3. Thin slices to put onto a spinach salad with strawberries & poppy seeds.
--For dressing, whisk together
2 T sesame seeds
2 T poppy seeds
1/2 cup olive oil
1/4 cup honey
1/4 cup raspberry or apple cider vinegar
1 T finely grated onion
1 tsp Worcestershire sauce
-- Pour over mixed baby spinach leaves, red onion rings, sliced almonds and sliced strawberries. Decorate the top with sliced pears.

4. Slice them, put them in a single layer on a wax paper covered cookie sheet. Freeze until solid, then pack into large zippy bags. Good to throw in smoothies later. And, strangely enough, my kids actually enjoy eating frozen fruit, especially on hot days.

5. Spiced Pear Sauce--very easy!
--puree in blender with cinnamon & nutmeg. That is it! The cinnamon and nutmeg not only make it taste yummy, but also keeps little people from frowning upon brown pear sauce. Pears turn brown easily once pureed, but if the kids know it is cinnamon pear sauce, they will assume that it is brown because of the cinnamon. That way you don't need to add any preservatives. This keeps about a week in the fridge (never lasts that long around here) or you can freeze it.

6. Pear Popsicles--Just puree the pears and pour into popsicle molds. (Buy them at the dollar store or Target or Wal-mart.) This makes a nice sweet treat for later.

7. Can them. You can do this without an official canner. You just need a very large, sturdy pot. Click here for info from Ball.

8. Make raspberry filled pears. Simple, elegant, delish! Watch the video for how to.

Watch for Chef Maki to return with more cooking ideas in future blogs. :)